Continuous Integration/Continuous Delivery (CI/CD) has always been, and still is, the responsibility of DevOps professionals.
But now that GitHub has CI/CD capabilities thanks to GitHub Actions, it’s simpler than ever to integrate CI/CD into your process model directly from your GitHub repo.
Step 1: Create or choose a repository
It might sound very simple, but choosing or creating a GitHub repository is the first step in setting up a CI pipeline with GitHub Actions. You can either start from scratch or fork an existing project on GitHub if it has a code base you like.
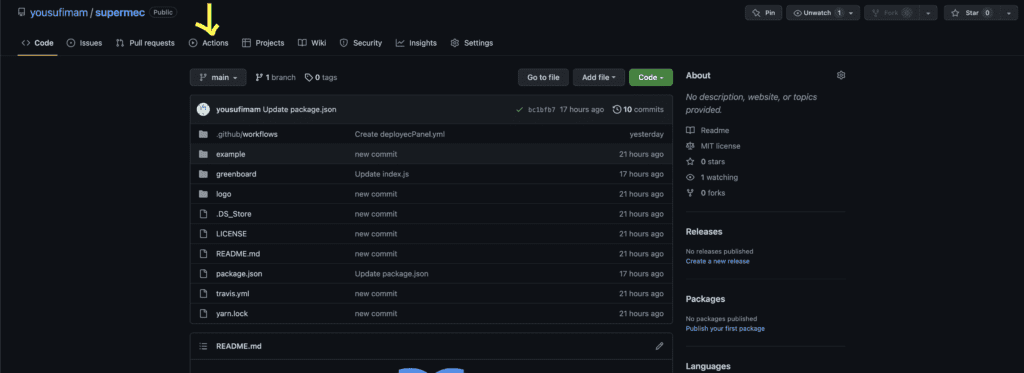
Step 2: Open GitHub Actions in your repository to start building your CI/CD workflow
Open the GitHub Actions tab in the top navigation bar of your repository to start creating your CI/CD pipeline.

Step 3: Add Workflow of your own
If your project uses specific technologies, you should see a list of CI/CD and workflow automation templates (side note: For now we set our own workflow. If you’re interested, check out the information later blog). click “set up a workflow yourself” link.

Now you will add your custom workflow by adding code into the Edit new file tab after that click “start commit” button.

please add your branch name in on > push > branches

Step 4: Setup envirment varialbes of server credentials
Now we have to provide server credentials into the Action Secret section this inforation is related to hosting server where the project hosted. you can find it by clicking
from the top navigation bar then secrets > Actions now you will see the “New repository secret” button click it.

Your credentials should be added one at a time.
name: FTP_SERVER -> secret: your hosting server
name: FTP_USERNAME -> secret: your server username
name: FTP_PASSWORD -> secret: your server password

Step 4: Make code changes to active your CI/CD process.
To gain a complete understanding of how your pipeline is operating, have a look at the workflow visualizer and live logs.
After pushing the abovementioned modification, you can start enjoying yourself by watching your pipeline operate in real-time using a workflow visualizer and live logs.

If you need to know more info about GitHub actions please visit to https://resources.github.com/devops/tools/compare/
Please share your kind feedback in the comments section. For any query, feel free to Contact us or email us on info@kaispe.com


