Stripe Payment method integration on Power Pages
Power Pages is a powerful tool for building web portals that allow external users to interact with your data and processes. It was previously called PowerApps Portal. If you are looking to accept payments through your Power Pages, Stripe is an excellent choice. Stripe is a popular payment gateway that supports payments from all major credit and debit cards, as well as other payment methods such as Apple Pay and Google Pay. In this blog, we will walk through the steps to integrate Stripe in Power Pages.
Step 1: Create a Stripe Account and Get API Keys
Before integrating Stripe in Power pages, we need to have a Stripe account and get API keys. To create a Stripe account, go to the Stripe website and sign up. Once we have an account, we can get API keys from the Stripe dashboard. We will need both the Publishable Key and the Secret Key for this integration.
Step 2: Add Stripe Checkout Script to Power Pages
The next step is to add the Stripe Checkout script to the HTML file of the Power page where you want to display the payment form.

Step 3: Create a Payment Form
Once we have added the Stripe Checkout script, we can create a payment form that will allow our customers to enter their payment information. Add id to submit button so that stripe checkout can be added.


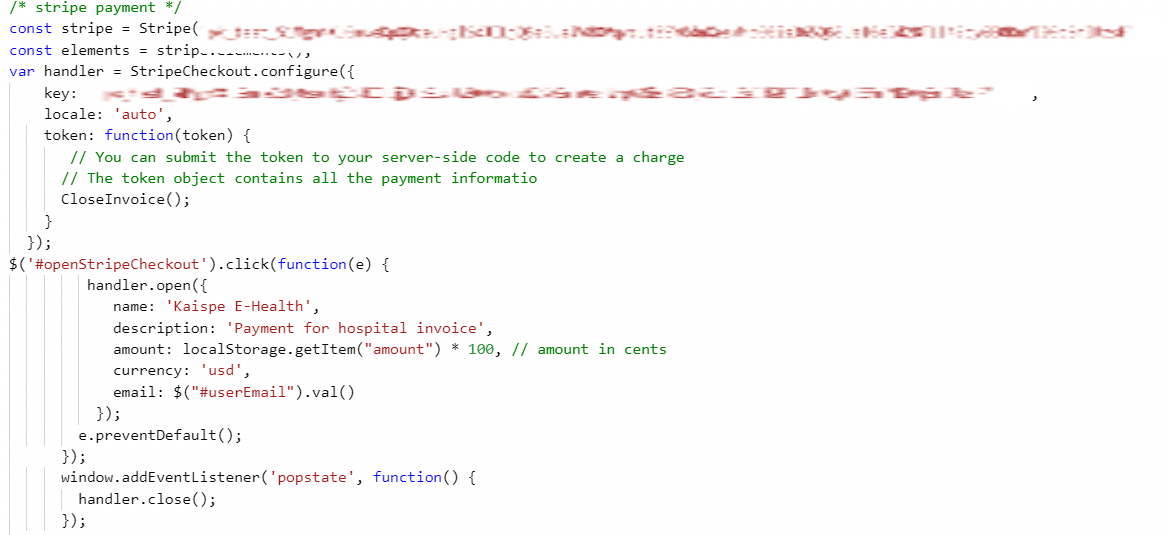
Step 4: Initialize Stripe Checkout
Next, we need to create a JavaScript that initializes the Stripe Checkout form and opens it when the user clicks the “Pay with Stripe” button. In this piece of code, we need to define the configuration options for the payment form, such as the amount to charge, the currency, and the payment description.
Step 5: Proceed with Stripe Payment
On clicking Pay button, built in stripe checkout form will open which ask for card number and CVV after entering details, click on pay button to pay the amount successfully.

I hope you found it useful. If you have any queries, please feel free to contact KAISPE at info@kaispe.com


